Whether it's a punk rock vibe or a vibrant electronic dance track, reverb is the heart of any great mix. No matter what genre you're working on, reverb plays a crucial role—whether you're aware of it or not. This Waves technical article will guide you through the fundamentals of reverb and how to achieve professional-sounding results in your mixes.
1. Feeling or Hearing? Dry Reverb or Wet Reverb?
In any well-crafted mix, you'll often find that reverbs are carefully applied to individual instruments or grouped tracks. There are generally two types of reverb: the one you feel, known as "dry reverb," and the one you hear, sometimes referred to as "wet reverb."
Dry reverb is typically short and subtle, simulating small or medium-sized rooms. It adds clarity and realism without muddying the mix, helping separate instruments and maintaining depth. It’s especially useful when using bus compression, as it prevents the mix from sounding flat.
Wet reverb, on the other hand, includes longer reflections like hall or plate reverb. These can add intensity, depth, and a sense of space, making the mix more immersive. Important elements such as lead vocals or main instruments often benefit from this type of reverb. However, choosing when and how much to use is key—too much can make the mix sound muddy or unclear.
The key to effective mixing lies in balancing these two types of reverb for a cohesive and natural sound.
2. Insert or Send/Return?
Inserting a reverb plugin directly onto a track is quick, but it limits your control over the dry and wet signals separately. Instead, using send/return routing offers greater flexibility and allows you to apply the same reverb to multiple tracks with different levels of intensity.
Most DAWs offer send and auxiliary track options. Learning how to set up sends and returns can greatly improve your workflow and give you more creative freedom. If you're not familiar with this feature, check your DAW's manual for detailed instructions.
3. Size Matters!
When setting up a reverb, the first parameter to adjust is the size. It determines the spatial perception of the effect.
The size of the reverb is usually judged based on the time delay of early reflections. These are the first echoes that bounce off surfaces like the floor, ceiling, or walls. Their timing and frequency response help listeners understand the size of the space being simulated.
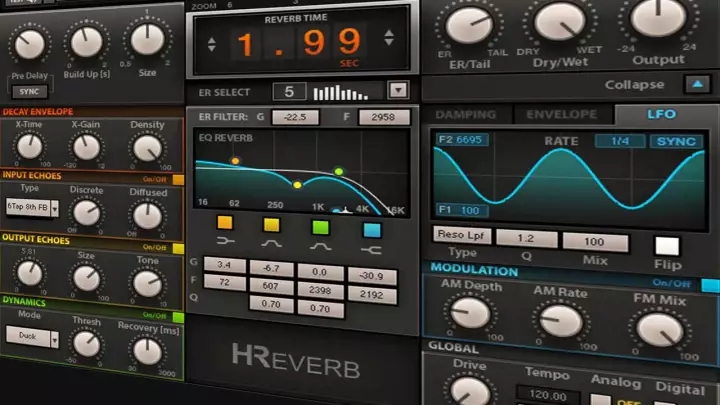
To set the size, start by adjusting the Mix control so that only the early reflections are audible. Then gradually increase the return level until you hear the desired spatial effect. A smaller size gives a more present and lively sound, while a larger size adds depth and impact. Plugins like H-Reverb and Renaissance Reverb allow fine-tuning of early reflections, which can dramatically affect the overall sense of space.
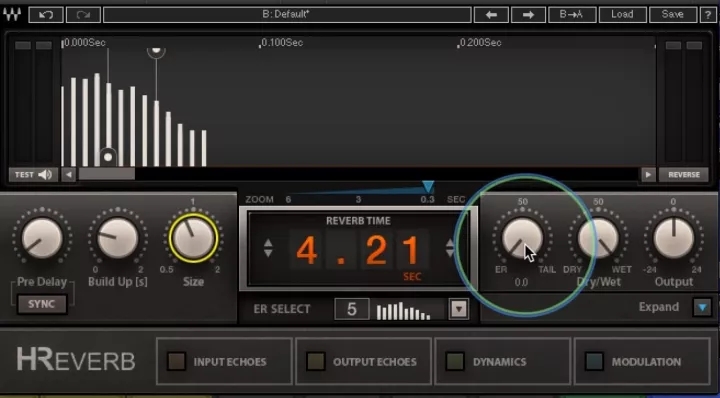
Early reflection settings on H-Reverb
4. Reverb Time Based on Tempo and Rhythm
In general, the reverb time should match the tempo and rhythm of the music. Faster tempos usually require shorter reverb times, while slower tempos may need longer ones.
However, there are exceptions. For example, if a vocal performance has long sustained notes, you can afford to use a longer reverb. On the flip side, if a rhythm section is slow, shorter reverb times may be better to avoid blurring the mix.
5. Reverb Type: Natural or Creative?
Each reverb type has its own unique character, whether it's natural or artificial. Choosing the right one is essential for achieving the desired sound.
Natural reverb plugins like Waves IR1 Convolution Reverb simulate real-world acoustic spaces. Room reverbs are best suited for small spaces, while church or lobby reverbs work well for larger areas. They mimic real-life acoustics and are relatively easy to set up.
Creative reverb types, such as non-linear or inverted effects, are used to add character and uniqueness to a sound. Mechanical reverbs like spring or plate reverb can also add texture and energy. These tools allow you to experiment and create more dynamic and expressive mixes.
The general rule is to choose a reverb that contrasts with the original sound. For example, a dry drum track can gain more life with threshold or reverse reverb, while a vibrant piano might benefit from a smoother, more natural reverb.
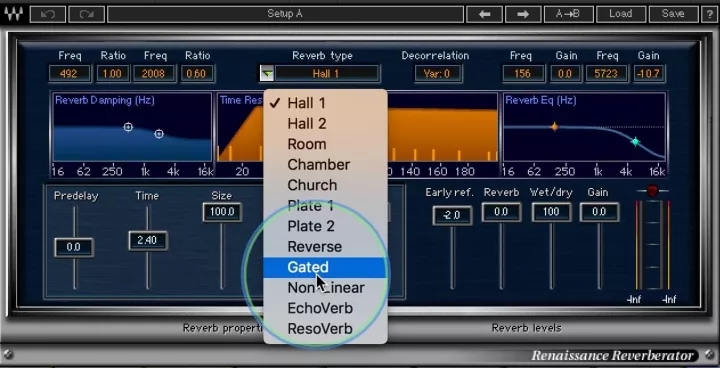
Digital reverbs such as Renaissance Reverb allow selection of specific reverb types
6. Pre-Delay and Dry/Wet Balance
Pre-delay is another important factor in creating a realistic reverb. It refers to the time between the dry signal and the onset of the reverb. The longer the pre-delay, the deeper the reverb feels. Shorter pre-delays bring the wet reverb closer to the dry signal, affecting the perceived distance and intimacy of the sound.
For small spaces like a bedroom, pre-delay settings between 0–10ms are ideal. For medium spaces, 10–20ms works well, while large spaces like halls or churches may require more than 20ms. Remember, these settings should also consider the song’s tempo, rhythm, and overall density. It's best to adjust pre-delay in the context of the entire mix.
7. Diffusion, Density, and Decay
Diffusion and density describe the amount of reflections in the reverb field over time. More reflections mean a denser and more spread-out sound. High diffusion can make weak sounds fuller, while lower density is better for open, spacious environments.
Decay controls how quickly the reverb fades at different frequencies. High-frequency energy tends to decay faster unless the room has very hard surfaces like stone or porcelain.
Combining diffusion and decay settings is a common technique. For instance, a short room reverb with high density and high-frequency decay can add fullness to a snare or vocal. Alternatively, adjusting decay to emphasize high frequencies can add expression to a dull snare or vocal.
8. Overall Reverb Control
Applying the perfect reverb to a single track is one thing, but creating a cohesive overall reverb effect across the entire mix is another challenge. With a smart approach, you can solve this easily.
Strategy 1: Differentiate Reverb Types. Set a unique reverb for the lead vocal, for example. If you use a hall reverb for the vocal, avoid applying the same type to other elements in the mix. This keeps the vocal's reverb distinct and focused.
Strategy 2: Use One Reverb Type. To create a unified space, apply the same reverb to all elements. This helps maintain consistency and avoids conflicting reverb characteristics. You can also test different buses under similar parameter settings to tailor each one effectively.
Strategy 3: Be Efficient. Rhythmic instruments often benefit from compact reverb settings. Mono reverb can work well for guitars, and sometimes slap delays are more effective than large reverbs. Keep reverb times short to maintain clarity and power in your mix.
UCOAX manufactures a wide spectrum of wire and cable assemblies, each custom-designed for each individual client. Coaxial cable, at the industrial level, is used for instrumentation, control, RF, and microwave applications. It is also commonly used to connect home video equipment and cable television. These cable assemblies are available both rigid and flexible options, and consist of four layers: a round conducting wire, insulating spacer, cylindrical conducting sheath, and a final insulating layer. For any cable fabrication needs, contact UCOAX.
Customized Cables,Custom Pc Cables,Custom Computer Cables,Custom Network Cables
UCOAX , https://www.ucoax.com